Preparing the floor before applying epoxy floor flakes is a crucial step that can significantly impact the final outcome of your flooring project. As a supplier of epoxy floor flakes, I’ve witnessed firsthand how proper floor preparation can make or break the installation process and the long – term durability of the floor. In this blog, I’ll share my insights on how to prepare the floor effectively before applying epoxy floor flakes. Epoxy Floor Flakes
Understanding the Importance of Floor Preparation
Before delving into the preparation steps, it’s essential to understand why proper floor preparation is so vital. Epoxy floor flakes are designed to adhere to a clean, smooth, and stable surface. If the floor is not properly prepared, the epoxy may not bond correctly, leading to issues such as peeling, bubbling, or uneven wear. Additionally, a well – prepared floor will enhance the overall appearance of the epoxy floor flakes, ensuring a professional and long – lasting finish.
Assessing the Floor
The first step in preparing the floor is to conduct a thorough assessment. This involves examining the floor for any existing damage, such as cracks, holes, or uneven surfaces. You should also check the moisture content of the floor, as excessive moisture can prevent the epoxy from curing properly.
- Visual Inspection: Walk around the area and look for visible signs of damage. Cracks can be caused by various factors, including settling of the building, temperature changes, or heavy traffic. Holes may be the result of previous installations or accidental damage. Note down the location and size of any damage so that you can address them appropriately.
- Moisture Testing: Use a moisture meter to measure the moisture content of the floor. Different types of flooring have different acceptable moisture levels. For example, concrete floors should generally have a moisture content of less than 4% for epoxy installations. If the moisture content is too high, you may need to take additional steps to dry the floor, such as using a dehumidifier or installing a moisture barrier.
Cleaning the Floor
Once you’ve assessed the floor, the next step is to clean it thoroughly. A clean floor is essential for proper adhesion of the epoxy floor flakes.
- Remove Debris: Start by sweeping or vacuuming the floor to remove any loose dirt, dust, and debris. Pay special attention to corners and edges, where dirt tends to accumulate.
- Degrease the Floor: If the floor has any grease or oil stains, use a degreaser to remove them. Apply the degreaser according to the manufacturer’s instructions, and scrub the stained areas with a stiff brush. Rinse the floor thoroughly with clean water to remove any residue.
- Etch the Floor: Etching the floor helps to create a rough surface that allows the epoxy to bond better. You can use an acid – based etcher or a mechanical grinding method. If using an acid etcher, follow the safety precautions carefully, as acids can be dangerous. After etching, rinse the floor thoroughly to remove any remaining acid.
Repairing the Floor
After cleaning the floor, it’s time to repair any damage that you identified during the assessment.
- Filling Cracks and Holes: Use a suitable filler to fill cracks and holes in the floor. For small cracks, you can use a crack filler that is specifically designed for epoxy applications. For larger holes, you may need to use a patching compound. Follow the manufacturer’s instructions for mixing and applying the filler, and make sure to smooth the surface to ensure a level finish.
- Leveling the Floor: If the floor is uneven, you may need to level it before applying the epoxy. There are several methods for leveling a floor, including using a self – leveling compound. This compound is poured onto the floor and spreads out to create a smooth, level surface. Follow the manufacturer’s instructions for mixing and applying the self – leveling compound, and allow it to dry completely before proceeding.
Priming the Floor
Once the floor is clean and repaired, the next step is to apply a primer. A primer helps to seal the floor and improve the adhesion of the epoxy.
- Choose the Right Primer: Select a primer that is compatible with the type of epoxy floor flakes you are using. There are different types of primers available, including water – based and solvent – based primers. Consider the environmental conditions and the specific requirements of your project when choosing a primer.
- Apply the Primer: Follow the manufacturer’s instructions for applying the primer. Use a roller or a brush to apply an even coat of primer to the floor. Make sure to cover the entire surface, including the edges and corners. Allow the primer to dry completely before proceeding to the next step.
Applying the Epoxy Base Coat
After the primer has dried, it’s time to apply the epoxy base coat. The base coat provides a smooth surface for the epoxy floor flakes to adhere to.
- Mix the Epoxy: Follow the manufacturer’s instructions for mixing the epoxy. Make sure to use the correct ratio of resin and hardener, and mix the components thoroughly to ensure a consistent mixture.
- Apply the Epoxy Base Coat: Use a roller or a squeegee to apply the epoxy base coat to the floor. Start at one corner of the room and work your way across, applying an even coat of epoxy. Make sure to spread the epoxy evenly to avoid any puddles or thick spots.
- Allow the Base Coat to Cure: The curing time of the epoxy base coat will depend on the type of epoxy and the environmental conditions. Follow the manufacturer’s instructions for the recommended curing time. It’s important to allow the base coat to cure completely before applying the epoxy floor flakes.
Applying the Epoxy Floor Flakes
Once the base coat has cured, you can apply the epoxy floor flakes.
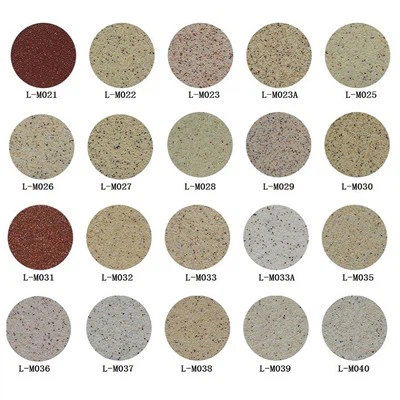
- Choose the Right Flakes: Select epoxy floor flakes that are suitable for your project. Consider the color, size, and density of the flakes to achieve the desired look.
- Broadcast the Flakes: Start by pouring a small amount of flakes onto the floor. Use a spreader or your hands to broadcast the flakes evenly over the wet epoxy base coat. Make sure to cover the entire surface, including the edges and corners.
- Press the Flakes In: After broadcasting the flakes, use a roller or a trowel to press the flakes into the epoxy base coat. This will ensure that the flakes are firmly embedded in the epoxy and will prevent them from coming loose.
- Remove Excess Flakes: Once the flakes have been pressed in, allow the epoxy to dry for a few hours. Then, use a broom or a vacuum to remove any excess flakes from the floor.
Applying the Top Coat

After the epoxy floor flakes have been applied and the excess flakes have been removed, the final step is to apply a top coat. The top coat provides added protection and durability to the epoxy floor.
- Choose the Right Top Coat: Select a top coat that is compatible with the epoxy floor flakes and the base coat. There are different types of top coats available, including clear coats and colored coats.
- Apply the Top Coat: Follow the manufacturer’s instructions for applying the top coat. Use a roller or a brush to apply an even coat of top coat to the floor. Make sure to cover the entire surface, including the edges and corners.
- Allow the Top Coat to Cure: The curing time of the top coat will depend on the type of top coat and the environmental conditions. Follow the manufacturer’s instructions for the recommended curing time. Once the top coat has cured, the floor is ready for use.
Conclusion
Dry Particles Preparing the floor before applying epoxy floor flakes is a multi – step process that requires careful attention to detail. By following these steps, you can ensure that your epoxy floor flakes are installed correctly and will provide a long – lasting, beautiful finish. If you have any questions or need further assistance with your epoxy floor project, don’t hesitate to reach out. As an epoxy floor flakes supplier, I’m here to help you every step of the way. Whether you’re a DIY enthusiast or a professional contractor, I can provide you with the high – quality epoxy floor flakes and the expertise you need to achieve the perfect flooring solution. Contact me for more information on our products and to discuss your specific project requirements.
References
- "Epoxy Flooring Installation Guide", published by industry – leading flooring associations.
- Product manuals of epoxy floor flakes and related materials.
Dengjian New Materials Technology Dongtai Co., Ltd.
As one of the most professional epoxy floor flakes manufacturers and suppliers in China, we’re featured by quality products and good price. Please rest assured to buy customized epoxy floor flakes made in China here from our factory. Contact us for pricelist.
Address: Qindong New Materials and Equipment Industrial Park, Dongtai City, Yancheng City
E-mail: 992683005@qq.com
WebSite: https://www.djwallmaterial.com/